
How to take your own LinkedIn headshot
You can take a great headshot using your smartphone and no one will be the wiser with these tips.

In the job hunt, what matters most is highlighting the strengths and skills that only you can bring to a company. But, having a great headshot will help potential employers put a face to your name and can be another way to show your personality. In the time of social distancing, going to a photo studio or hiring a photographer might not be an option.
Don't stress! You can take a great headshot using your smartphone and no one will be the wiser.
Keep reading for some best practices to get a professional looking selfie in your own bedroom or backyard.
Wardrobe:
Wear a clean and pressed professional top or that you are comfortable in (your bottoms won’t be in the picture so this part doesn’t matter as much). Jewel tones and neutrals are best, as super bright colors will reflect back onto your face.
Keep the outfit basic and use accessories to show your personality - jewelry, glasses, bowties, favorite lipstick, etc., can show employers what you’re about while making sure what you are wearing isn’t the entire focus of the picture.
Don’t wear shirts with words, logos, or small prints on them. They appear distracting and distorted in photos.

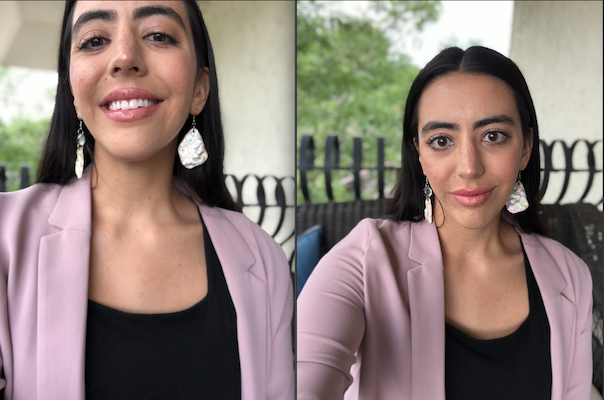
Location:
Try to take your photo outside. This will give you natural lighting and more options for your background. For your background, use distant greenery or a neutral wall or building. Don’t stand flush against a wall, you’ll want some space to create depth and focus in the picture.
It’s best to stick with a bright and neutral backgrounds. Walls or buildings with bright colors can cast the colors back onto your face.
If outside isn’t an option, find somewhere in your home that is well lit with minimal mess and distractions in the background.

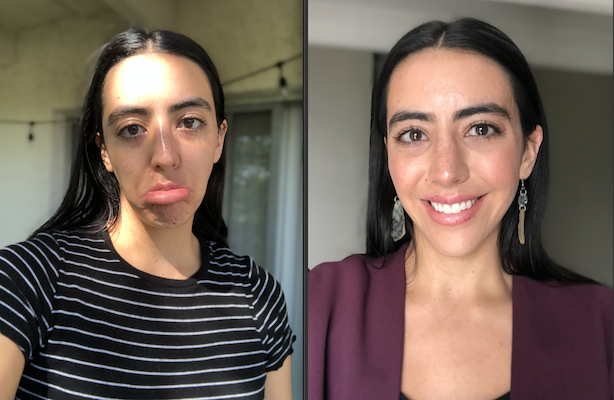
Lighting:
Bright, indirect lighting is what you are looking for. This will soften your complexion and make sure your face is the main focus of the picture. You’ll want to position your body to be facing your light source. Try going on a side of a building where the sun isn’t directly shining down, or under the shade of a tree or roof.
Don’t go in direct sunlight, as this will cast shadows on the face and you will be squinting. It’s best to take your photos early in the morning, or about an hour before sunset. When the sun is high in the sky, that means the light will be coming from above and will create shadows under your eyes - no one wants that!
If you’re taking your photo inside, find a window with indirect light and stand a few feet in front of it to take your photos.
Pose:
Take a deep breath and roll your shoulders back. Hold your phone out in front of you (wipe off the lens with a soft cloth before to make sure there aren’t any smudges on it blurring your photo) and take a few photos to see what angle you feel and look your best.
You don't want it to be obvious that this is a selfie, so don’t fully extend your arm (while keeping those shoulders rolled back). Aim for a 90 degree angle of your elbow with the phone just above eye level. Keep your eyes fixed just above the camera lens, slightly drop your chin, and give your best smile.
This is where you should play around to figure out how you feel the most comfortable and look your best. Snap a lot of photos, no one is keeping track! Then go through all of your options and pick a favorite.
Retouching:
If you followed the above directions, your photo shouldn’t need much (if any!) retouching. Adjust lightness and contrast if needed to make the photo pop and crop the photo so that it shows your shoulders and face and minimizes any background distractions.

Note: if you have another person around to take your photo and that makes you more comfortable, most of these guidelines can be applied to that scenario. Just have them stand a few feet in front of you at eye level and snap a variety of pictures for you!

This post was written by Lindsey Lucero, marketing coordinator for the Turing School and selfie enthusiast.